Node.js/Express Mongoose(몽구스)-CRUD-Create
16 May 2021디렉토리 구조나 파일 구조 등은 이전 포스트에서 이어짐
☄ Create Document
우리가 정의한 Schema model을 이용해 view에서 사용자가 전송한 데이터를 db에 저장하는 방법이다.
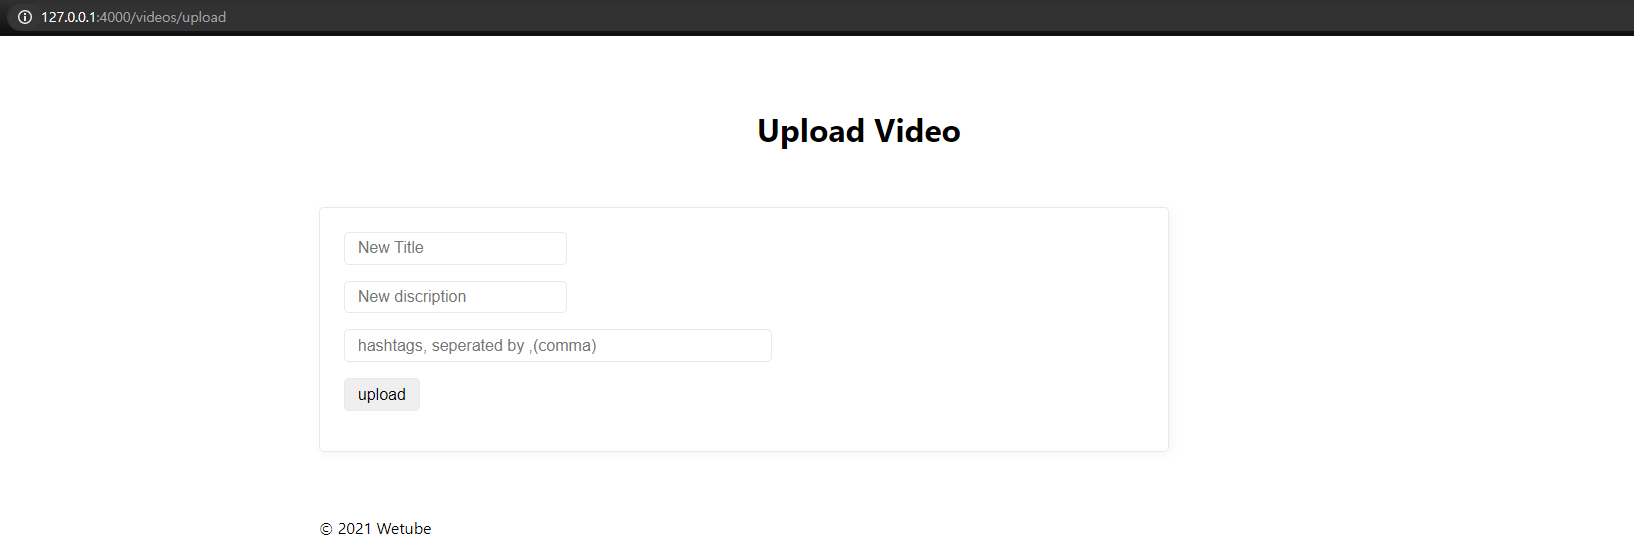
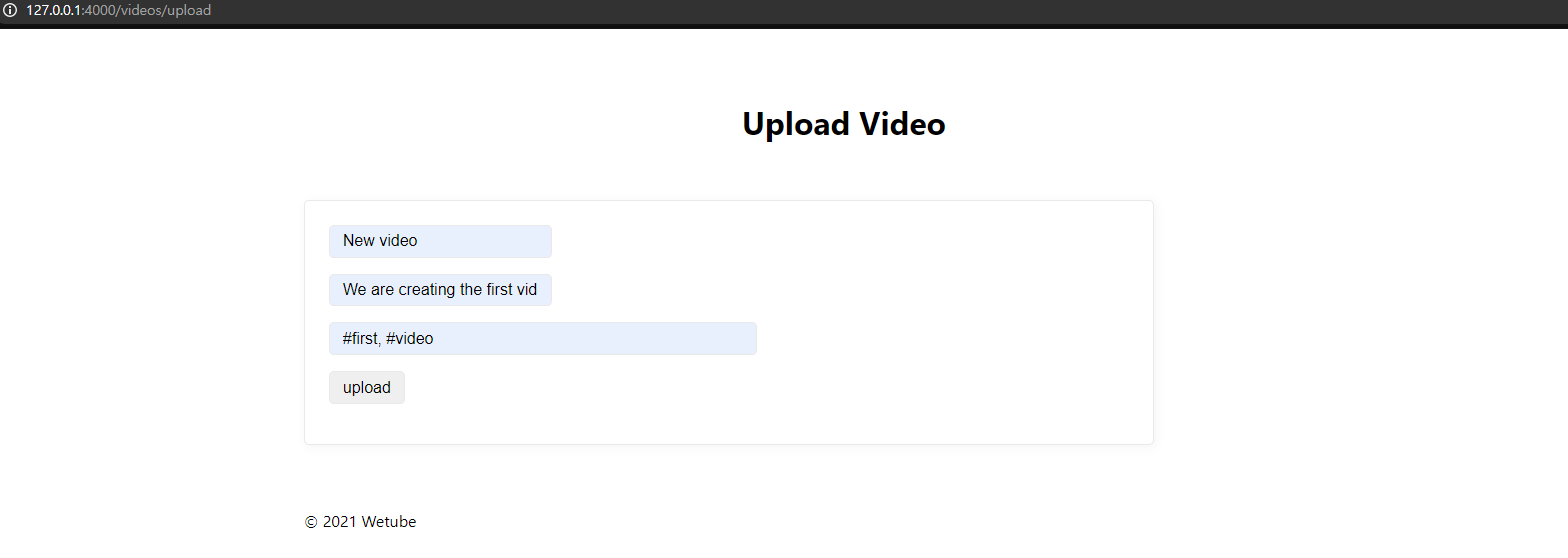
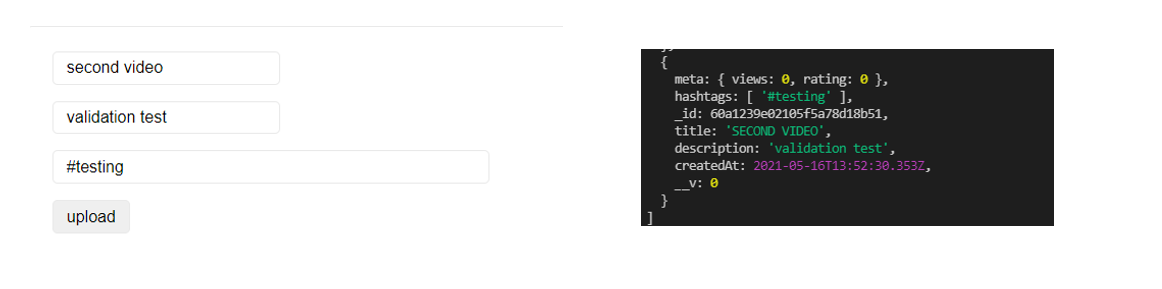
먼저 사용자가 입력할 form을 작성
// views/upload.pug

extends base

block content
    form(method="post")
        input(type="text", name="title", placeholder="New Title", required)
        input(type="text", name="description", placeholder="New discription", required)
        input(type="text", name="hashtags", placeholder="hashtags, seperated by ,(comma)", required, style="width: 50%")
        input(type="submit", value="upload")
중요한 부분은 request mothod가 POST인 점과 request.body에서 값을 저장해 전달될 변수인 name을 꼭 지정해 줘야 한다.
action 경로를 따로 지정해 주지 않았기 때문에 요청은 같은 페이지 url인 localhost:4000/videos/upload로 간다.
사용자가 입력한 데이터는 위 주소에 라우팅된 컨트롤러의 req.body에 저장 된다.
이 데이터를 이용해 먼저 이전에 Schema로 정의한 video model 객체를 만든다.
// controllers/videoController.js

// ... 생략

export const postUpload = (req, res) => {
  const { title, description, hashtags } = req.body;
  const video = new Video({
    title,
    description,
    createdAt: Date.now(),
    hashtags: hashtags.split(",").map((word) => `#${word.trim()}`),
    meta: {
      views: 0,
      rating: 0,
    },
  });
  console.warn(video);
  return res.redirect("/");
};
hashtags.split(',').map(word =>#${word.trim()})
→ 해쉬 태그를 ,로 구분해서 저장한다. map을 이용해 각 해쉬 태그에 #을 붙여주고, 앞 뒤 공백을 제거하기 위해 trim을 사용했다.

_id 값은 같은 collection 내에서 document들을 구분하기 위해 mongoose가 자동으로 할당한다.
각 필드(key 변수) 명을 같게 해서 작성해 주면, mongoose에서 해당 모델의 스키마를 참조해 유효성 검사를 알아서 처리해 준다.
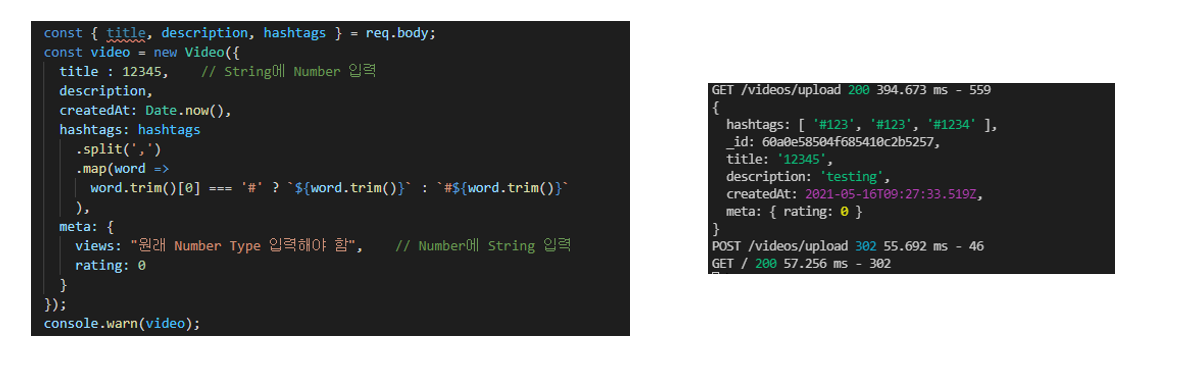
→ String에 Number를 입력하면 mongoose가 String으로 타입 변경 후 저장
→ Number에 String을 입력하면 mongoose가 해당 필드를 빼고 저장(아직 required 등의 설정을 스키마에 넣지 않음)
mongoose가 어느 정도의 validation을 해 주기 때문에 실수로 document에 이상한 값이 저장되는 실수를 줄일 수 있다. 이런 기능이 Schema의 필요성이고, 좀 더 꼼꼼하게 작성해야 하는 이유다.
하지만 아직 db에 저장되진 않고 실행 중인 node에서만 존재하는 데이터다. 이를 db에 저장해 주기 위해서는 save 메소드를 호출해야 한다.
// controllers/videoController.js
// ... 생략
export const postUpload = async (req, res) => {
// async 추가
const { title, description, hashtags } = req.body;
const video = new Video({
title,
description,
createdAt: Date.now(),
hashtags: hashtags
.split(",")
.map((word) =>
word.trim()[0] === "#" ? `${word.trim()}` : `#${word.trim()}`
),
meta: {
views: 0,
rating: 0,
},
});
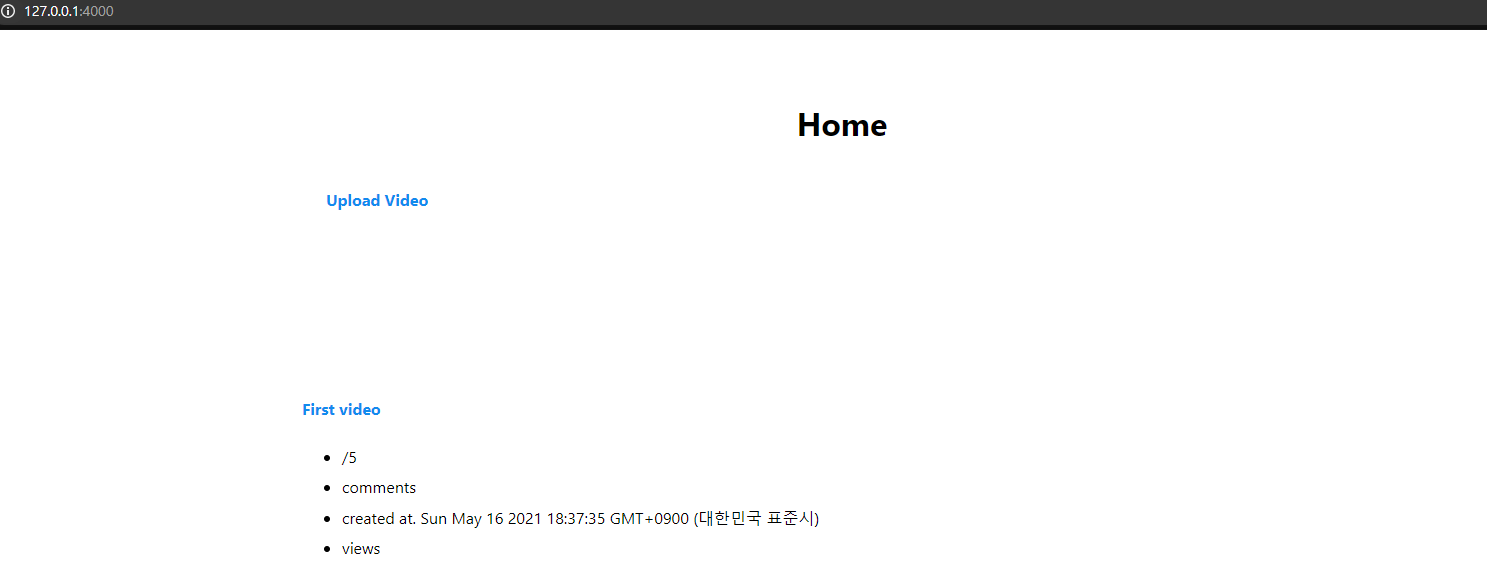
await video.save(); // await 추가
return res.redirect("/");
};
save는 Promise 객체를 반환하기 때문에 async await를 같이 작성해 준다(DB에 접속해 데이터를 저장할 때까지 기다려야 하기 때문에).
실제 mongDB shell에 접속해 확인해 보면,
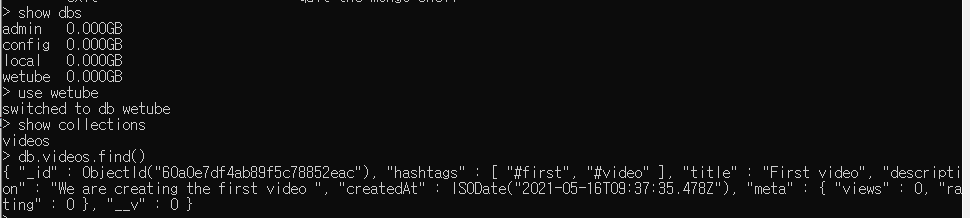
show dbs
→ wetube db가 새로 생성 됨 (이전에 생성한 적 없지만 사용할 db를 mongodb://127.0.0.1:27017/wetube로 연결했었기 때문에 → 참고)
use wetubeshow collections
→ videos 스키마가 새로 생성 됨
db.videos.find()
→ 쿼리로 생성한 document 조회
위 과정을 좀 더 깔끔하게 작성 → Model.create 메서드 사용
try {
    await Video.create({
      title,
      description,
      createdAt: Date.now(),
      hashtags: hashtags
        .split(',')
        .map(word =>
          word.trim()[0] === '#' ? `${word.trim()}` : `#${word.trim()}`
        ),
      meta: {
        views: 0,
        rating: 0
      }
    });
    return res.redirect('/');
  } catch (err) {
    console.warn('Video.create error: ', err);
    return res.status(404).render('upload', {
      pageTitle: 'Upload Video',
      errprMessage: err._message
    });
  }
};
마찬가지로 Promise 객체를 반환하기 때문에 await 키워드를 적어 주고, try ~ catch 문을 이용해 error처리를 한다. err 객체에는 에러 메세지가 짧게 작성되어 있는 _message 필드가 있으므로 이를 활용한다.
☄ 다양한 Schema Options 활용
→ https://mongoosejs.com/docs/schematypes.html 참고
// models/Video.js

// ... 생략
const videoSchema = new mongoose.Schema({
  title: {
    type: String,
    require: true,
    trim: true,
    uppercase: true,
    minLength: 2,
    maxLength: 30,
  },
  description: { type: String, require: true, trim: true, maxLength: 100 },
  createdAt: { type: Date, default: Date.now },
  hashtags: [String],
  meta: {
    views: { type: Number, default: 0 },
    rating: { type: Number, default: 0 },
  },
});
// ... 생략
required: 필수로 입력trim: 좌, 우 공백 제거uppercase: 알파벳을 항상 대문자로 저장minLength: 최소 글자 수maxLength: 최대 글자 수
→ minLength와 maxLength는 view에서 input 태그의 minlength, maxlength 속성과 같이 사용 권장
default: 입력하지 않았을 때 자동으로 채워줄 값
이 외에도 많은 Option들이 있으며, mongoose의 validation 기능을 적극적으로 활용할 수록 좋은 스키마가 된다.
// controllers/videoController.js 수정

// ... 생략
await Video.create({
  title,
  description,
  hashtags: hashtags
    .split(",")
    .map((word) =>
      word.trim()[0] === "#" ? `${word.trim()}` : `#${word.trim()}`
    ),
});
// ... 생략
default 설정한 필드는 필요 없으므로 삭제
Reference
Node.js 교과서(2판) - 조현영